One way to create your own fairy garden house

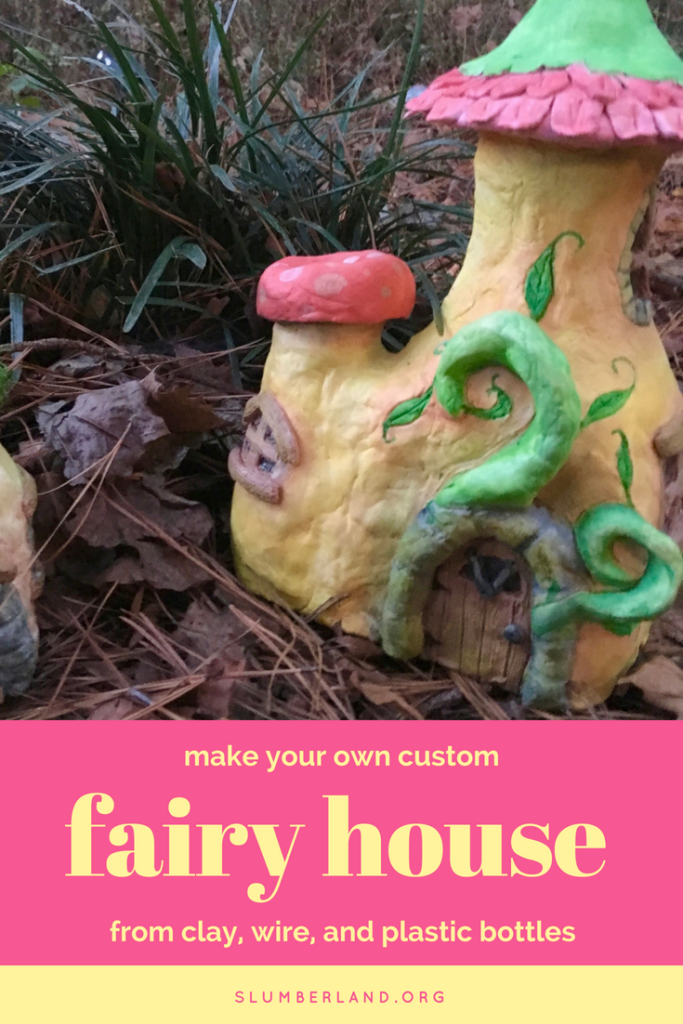 When you’re designing a miniature garden, little “fairy houses” are irresistible. A tiny castle or log cabin or Tudor house, the door ajar, surrounded by tiny trees and vines — there’s really nothing more magical. It’s even more magical if you have them light up in the evening.
The problem, however, is that fairy garden houses are really freaking expensive. The most affordable ones tend to be painted sloppily and poorly made. Ones that are really well-made? Well, you might have to take out a mortgage to pay for them. And that’s no fun at all.
Additionally, do you really want to have the same house in your garden that everyone else does? The ones at Jo-Ann or Michael’s are cute, but what if you want your garden to be unique?
There’s a simple solution to this — make your own! It’s a lot easier than it might seem.
Here is what you need to do this:
- Air-drying clay (I used DAS air-hardening modeling clay)
- Aluminum foil
- Craft wire (something like this, but I already had some around)
- Clear plastic bottles (I used a Tropicana orange juice bottle and one other smaller bottle that I can’t recall)
- Hot glue (hi-temp unless the house will never be in the sun) and a glue gun
- Watercolor paints
If you are a crafter, it’s likely you already have a bunch of these on hand. The only thing I had to buy was the clay.
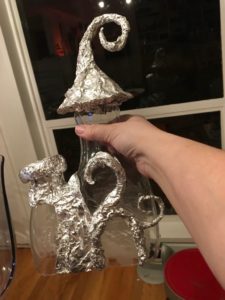 First, you will want to cut the bottles down a bit. Cut the base off of each, and then you can cut the neck to make it shorter, cut off a side so the bottles can attach more closely to each other, etc. It’s up to you. Set the lids aside — you might or might not use them later. Hot glue the bottles into position. You can see in the picture that I used two bottles together, and glued them side by side.
Then take your foil and start molding it into shapes, such as an arch to go around a doorway, and a smooth curve where bottles are joined, if you are using multiple bottles. Hot glue the foil onto the bottles.
If you want to have features that look like stems or vines, as I did, use craft wire to create an armature for each structure, then mold foil around the armatures. Again, glue these to the bottles.
You can use the bottle lids as bases for roofs for your house. You can also use other items such as craft sticks for these structures. Glue them on too.
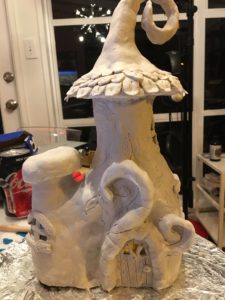
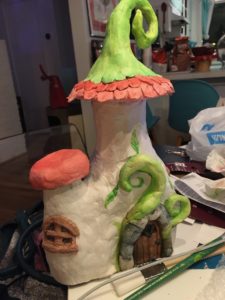
Now, it’s clay time! Get out your air-hardening clay. Roll out pieces of clay, wet your hands down well, and start smoothing the clay onto the structures you’ve created. Keep your hands wet and the surface of the clay wet to smooth it down. Cover the foil structures you have made.
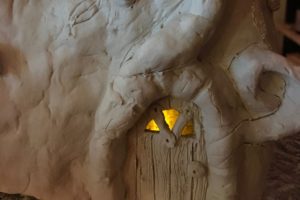
Use a blade to cut away spaces that will become windows. You can also use a blade or a pin to sculpt the clay to look like wood grain or other textures. Using more clay, add windowsills and any other items your house needs.
 Set the house aside to dry for at least 24 hours.
Once it’s dry, it’s time to paint. You don’t need any special type of paint. Watercolor works well, and is very forgiving for this. Start painting the house, and use multiple layers of color to make it look more realistic. Let your layers dry a bit before continuing, but since they are watercolors it’s a short wait.
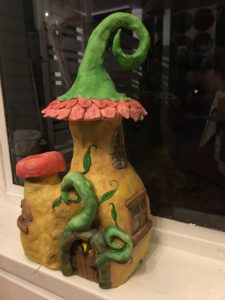 Keep adding paint until you are done. (I always keep going a bit after I should have stopped. You can always add more but it’s harder to remove if you’ve added too much!)
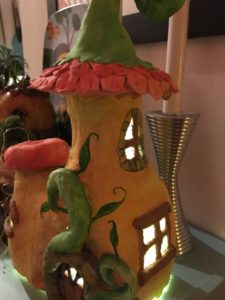 Once the paint is dry, all that remains is to put some LED lighting inside if you like, and you might consider spraying a protective varnish of some sort on the outside if it will be spending much time outdoors. You’ll want to protect the paint from water and UV light.
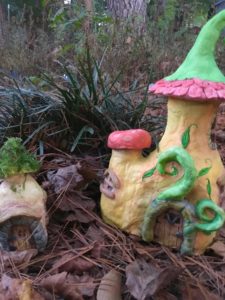
And there you have it! This one is actually the second one I’ve made. (The first one is the tiny one on the left of the picture below.) I know I can make them even better with some practice. I love that I have a miniature house for my garden that no one else has!
 I must give credit to Creative Mom on YouTube, who inspired me with this video. Her houses are much more professional appearing than mine, but I think with more practice I can get there. 🙂 And even one that isn’t perfect is pretty darned neat.
